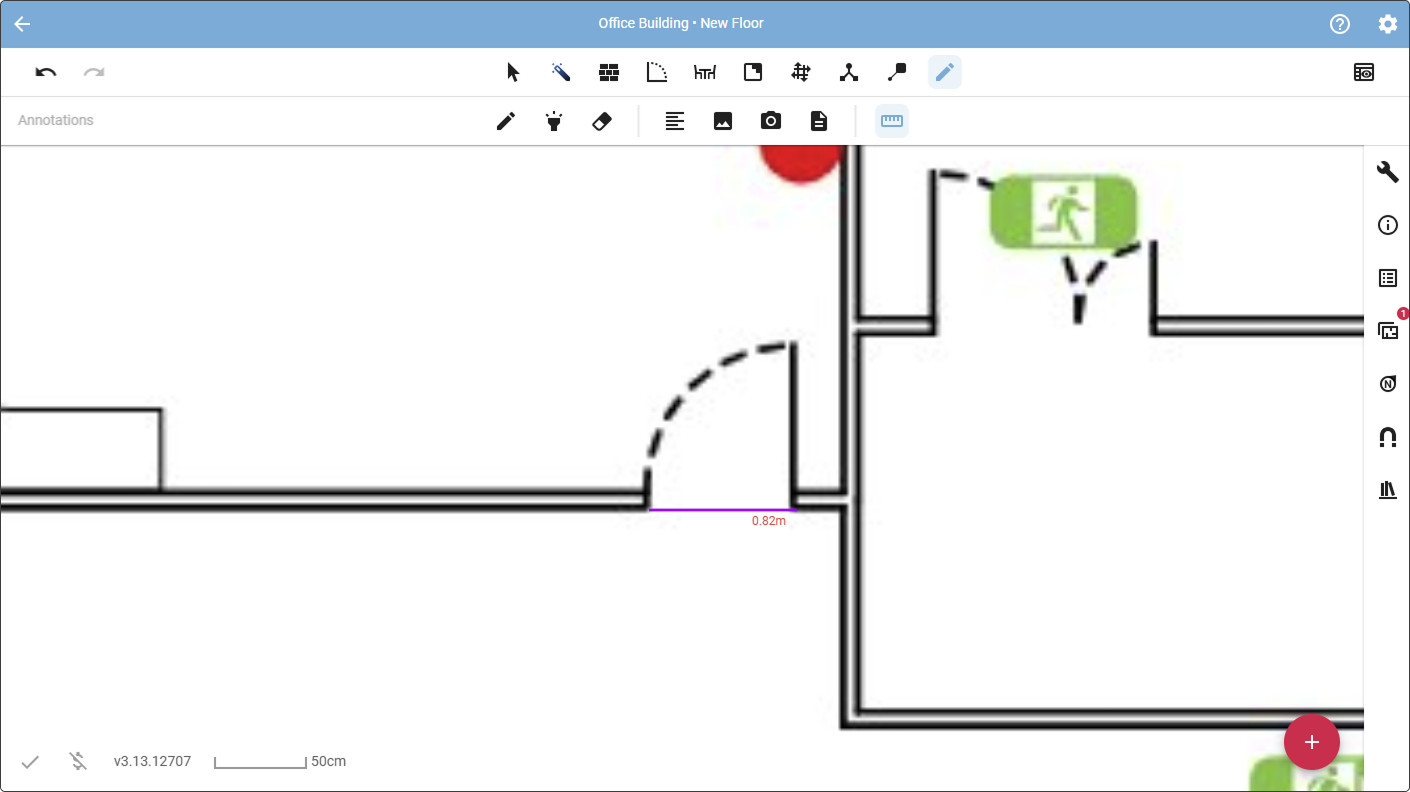
Step 1: Confirm Your Setup
Before you begin, make sure you have:
Familiarised yourself with the Plan Editor tools.
You’ll be starting your new floor plan using the “Create from Site Plan” option.
This ensures that you have access to satellite imagery, and that your plan can be accurately scaled and positioned.
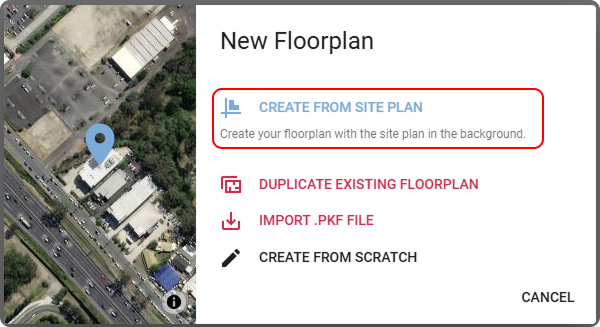
Step 2: Import your Existing Floorplan Graphic
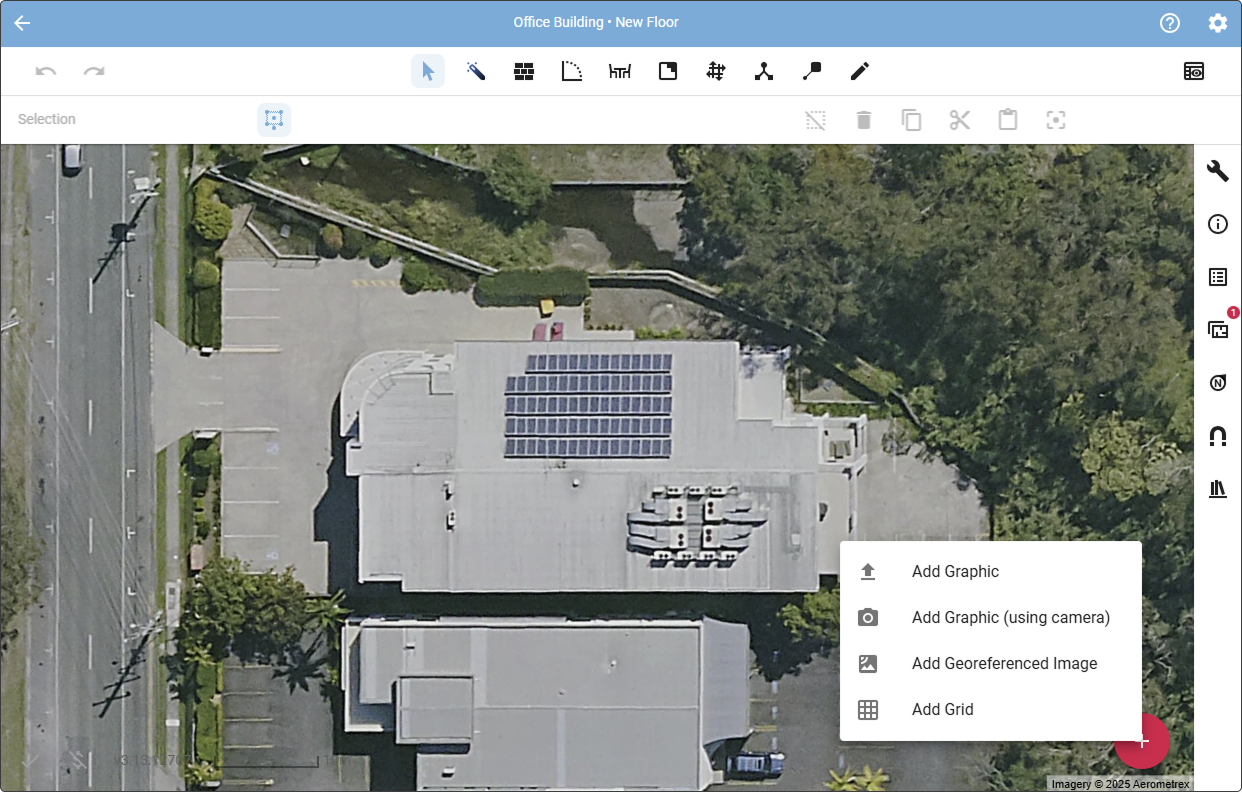
Make sure your Site Plan is visible in the browser so that you can clearly see the building you’ll be working on in the satellite image.
Then, click the pink “+” button to upload your floor plan graphic.
You can:
Upload an existing image file of your floor plan,
Take a photo directly from your device, or
Drag and drop a file from your computer into the window.
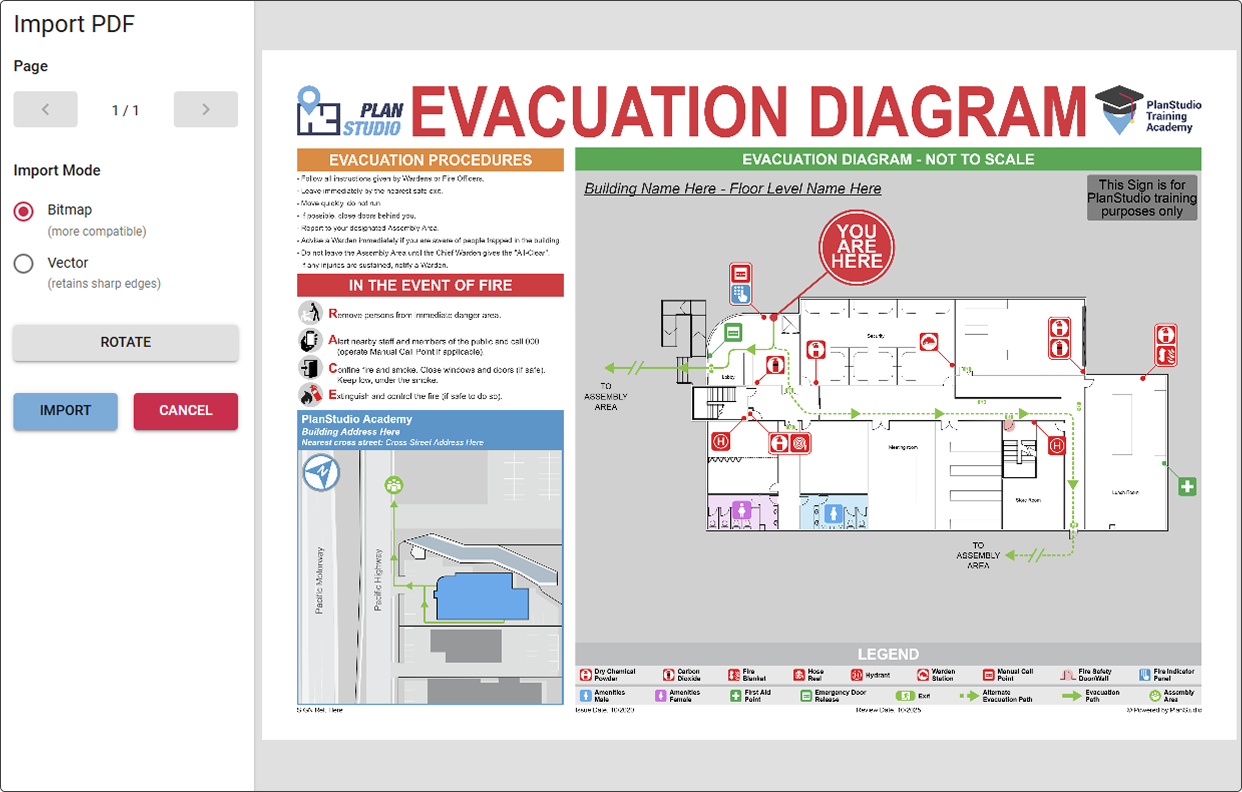
Once your image is uploaded:
Select the correct page if your document contains multiple pages.
Rotate the image if necessary so it is oriented correctly.
Choose the import type – either Bitmap or Vector, depending on your file type and size.
Click import, and fill out any attribution information if required.
5. Crop the image to remove any titles, legends, or other unnecessary information.
Step 4: Scale Your Floor Plan
Now it’s time to scale your floor plan to match the building outline on the satellite image.
You have three options to do this:
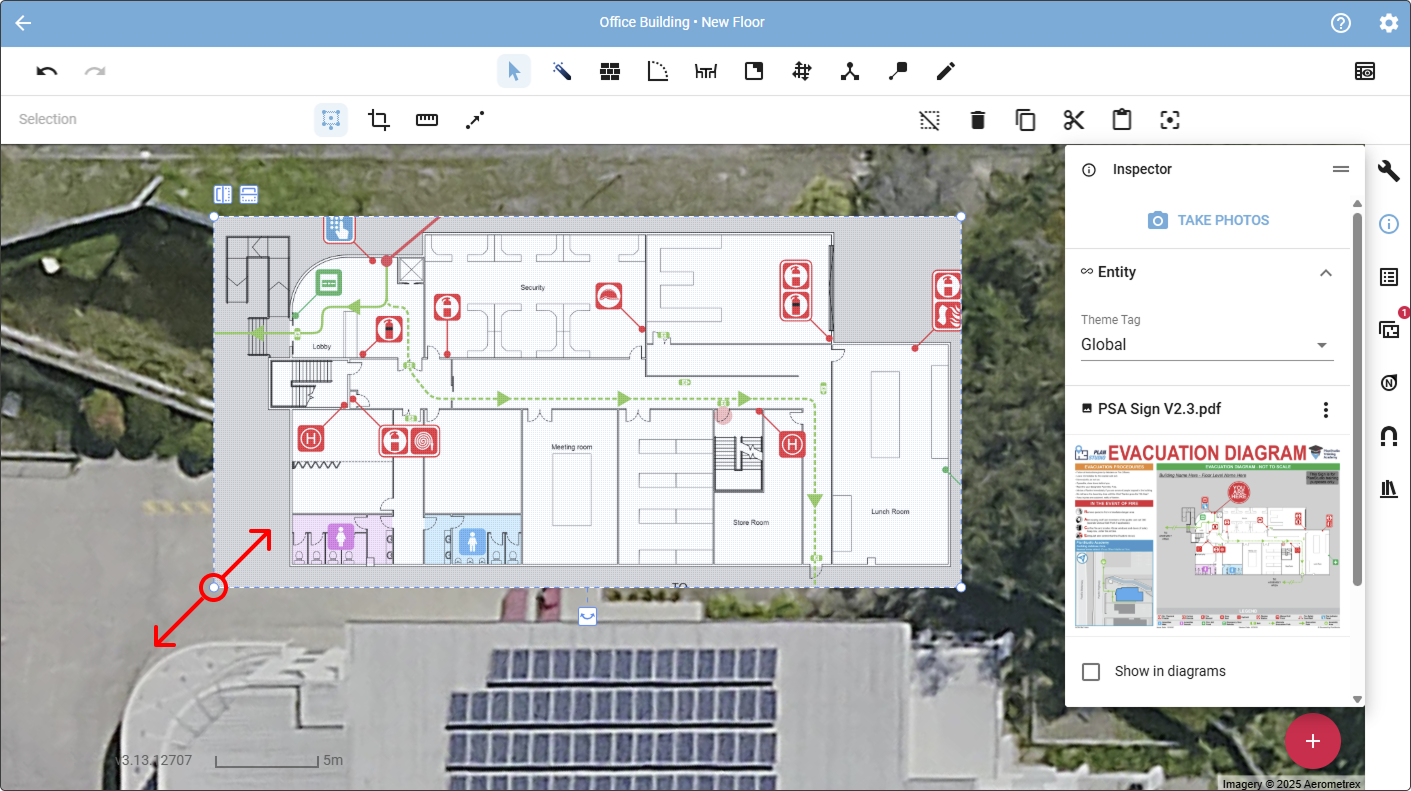
Option 1: Visual Scaling
Select the image corners and drag to resize visually until it aligns with the building outline.
Hold Shift while resizing to maintain proportions
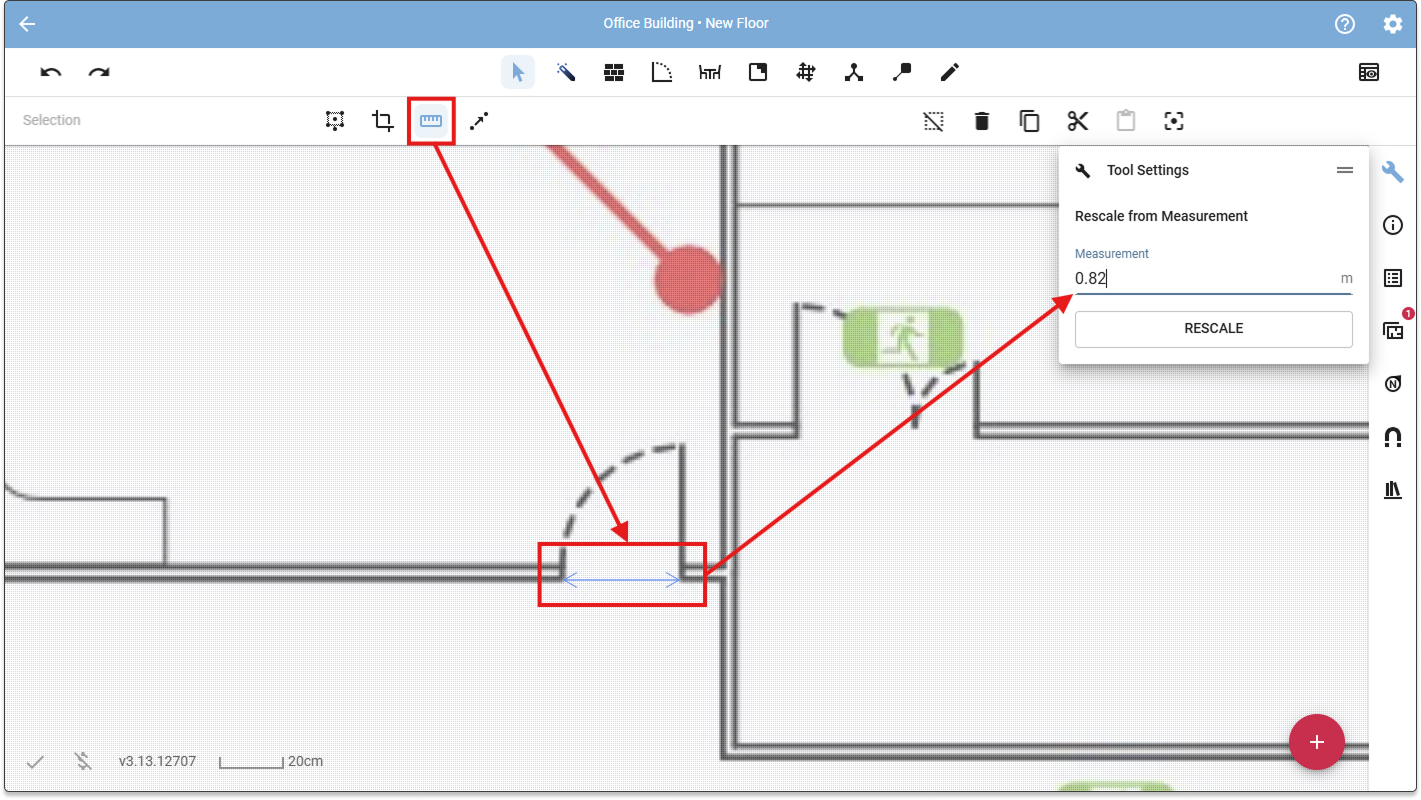
Option 2: Rescale from Measurement
Use the Rescale from Measurement mode.

Draw a line over a known measurement on the plan (for example, a scale bar, a dimension line, or a doorway width).
Enter the actual length of that measurement to automatically scale your plan.
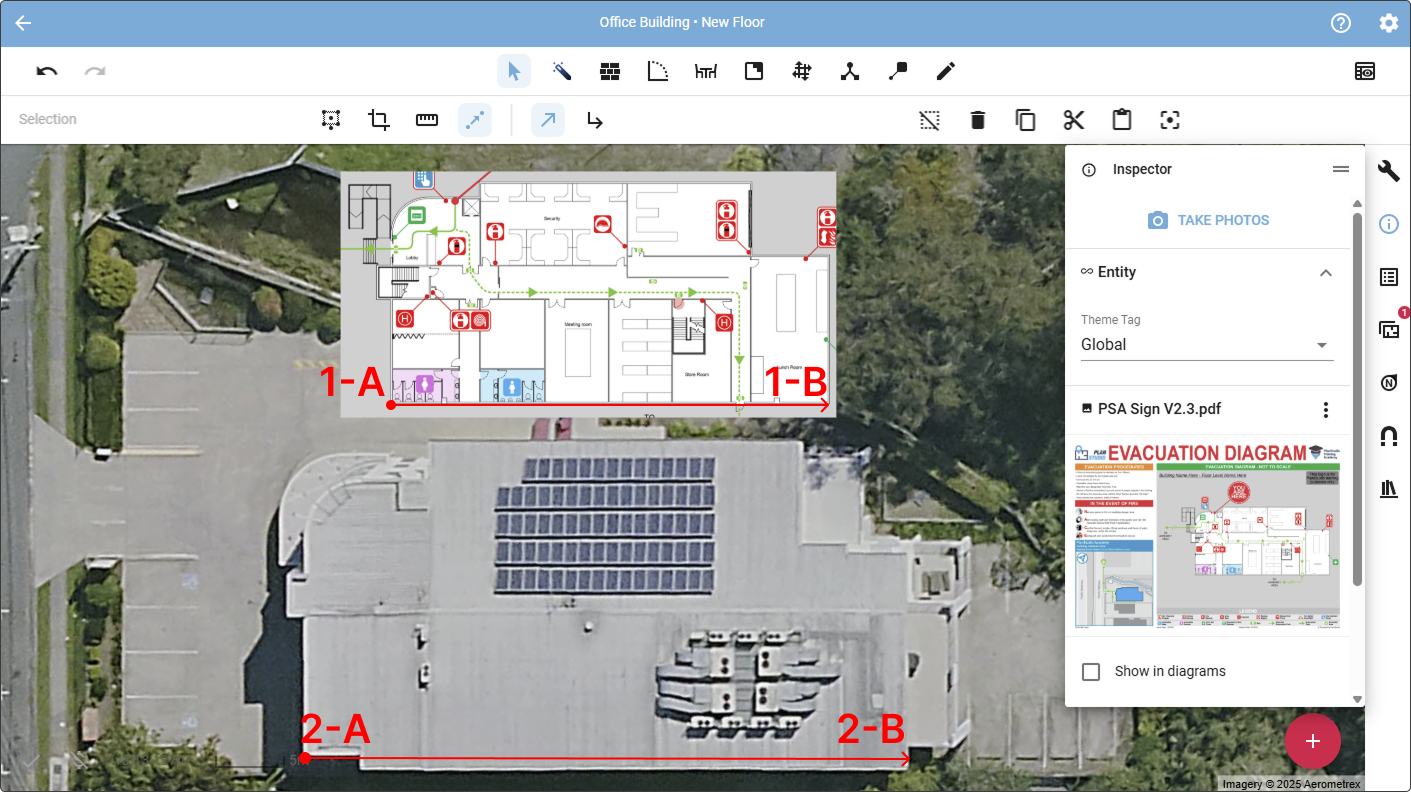
Option 3: Point-to-Point Scaling
Use the Point to Point Scaling mode.

Draw a line between two known points (A → B) on your plan.
Then draw the same line (A → B) on the satellite image to match the scale precisely.
Step 5: Align and Rotate the Plan
Once the graphic is correctly scaled:
Position the plan so it aligns accurately with the building on the satellite image.
-
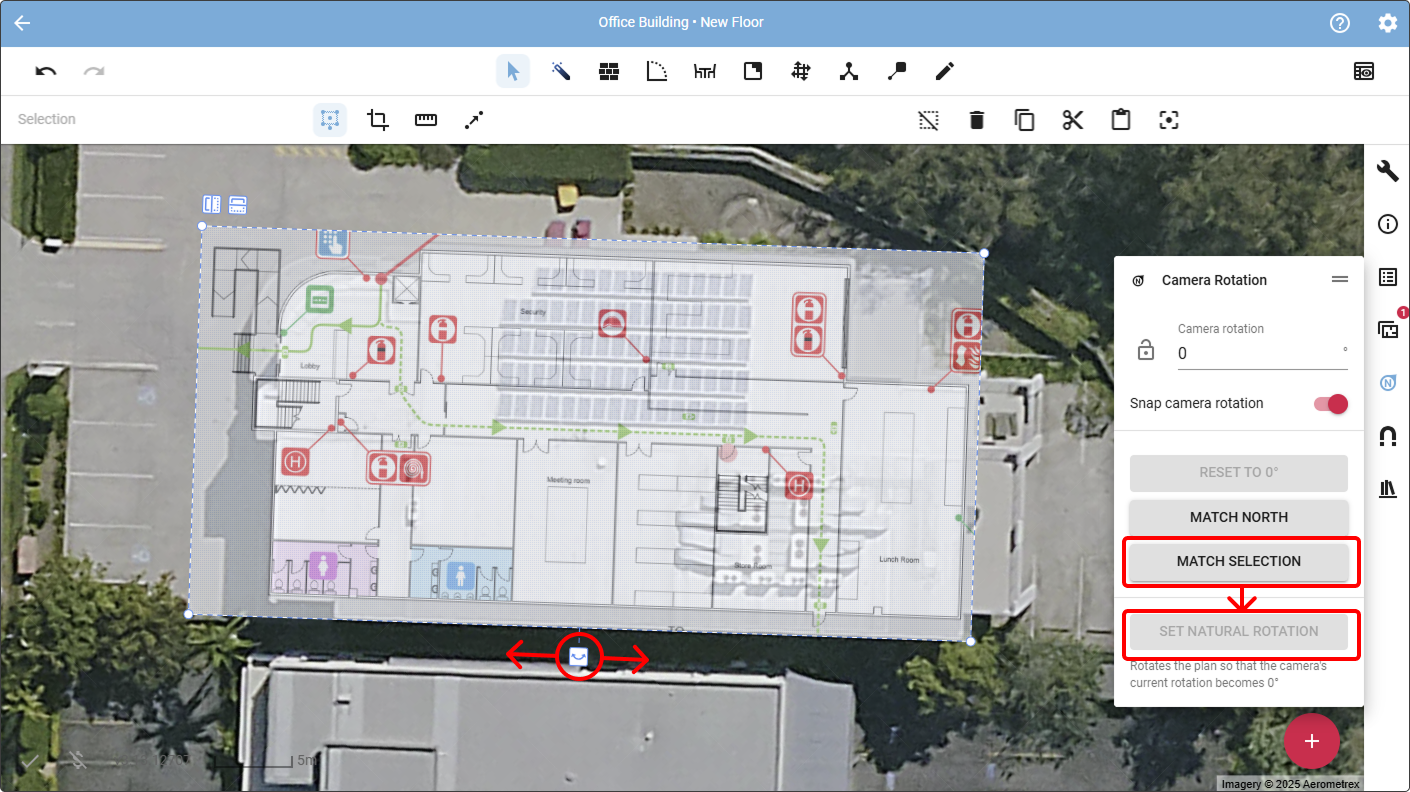
If necessary, rotate the graphic to match the correct building orientation, If the rotation of the plan has changed.
Select the image and use Camera Rotation to reorient your screen so the walls appear mostly vertical and horizontal.
Click Match Selection, then Set Natural Rotation to save this orientation as the default for this plan.
Step 6: Final Checks Before Drawing
Before you begin tracing or drawing:
Double-check that the scale, rotation, and position of your floor plan are all correct. Make any final adjustments now, it’s much easier to correct these details at the start than to fix them later.