
The Plan Editor is the main page you will be using in PlanStudio, It contains all the drawing tools and menus you will need to draft and edit your floorplans. If you are in the Plan Editor you should have already Created Your First Campus and you should see a satellite image available in the background.
Plan Editor Buttons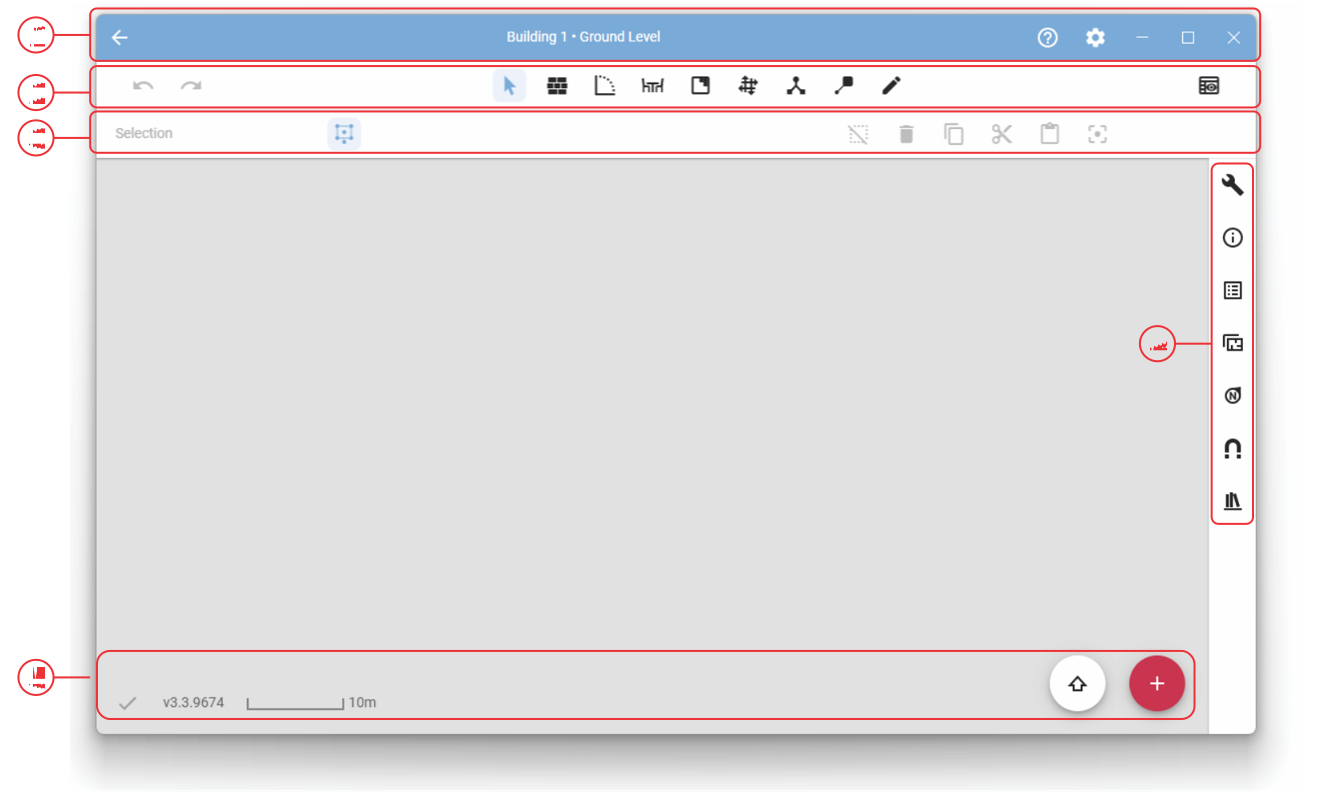
1. Menu Bar Buttons
The back button is in the top left hand corner of the window use this to return to the Plan Manager, The Building name and Floor name are the Window title in the center of the menu bar, In the top right hand corner there is a  Help button which contains the in-app tutorials as well as links to the Account Management Page and announcements. The Settings Menu
  is the last icon on the right.
2. Main Tool Bar
In the Main tool bar you have the undo and redo buttons on the left, and all of the drawing tools for creating & adorning your plans.
- The Selection Tool
- Walls
- The Openings Tool
- Features
- Zones
- Navigation
- Networks
- Equipment
- Annotations
On the right side of this menu you then have the Diagram preview button for viewing, editing and publishing your diagrams and other plans.
3. Sub Tool Bar
In the Sub Tool Bar you will see the name of the current tool you are using in the left, The tool bar will have a selection of tools to interact with your current selection such as: clear current selection, delete, copy, cut & paste as well as an option to center the selected object on your screen. The Sub Tool Bar will also provide you with different options depending on the current tool in use.
4. The Side Panels
located on the right of the screen contains:
- The Tool settings and inspector panels that work alongside the drawing tools you will be using.
- The Browser panel for viewing your layers and objects currently placed in the drawing.
- The Plans Panel where you can bring in a site plan or another floor as an underlay to your current floor plan, as well as quick switch to other plans in the campus.
- Camera Rotation menu, for rotating the screen as well as locking rotation when using a touch screen device.
- The Snapping settings.
- The library panel for changing the current library you are working in.
5. The Bottom Bar
This section of the Plan Editor houses the save indicator down the bottom left which will show you the current save status for your job, as well as the version number and a scale bar showing the current scale of the plan. In the bottom right corner you have the Pink Plus button used to add objects to your plans, such as photos, graphics and documents, and beside this (if enabled through the Preferences) you will have the virtual shift key, allowing you to make multiple selections when on a touch screen device.
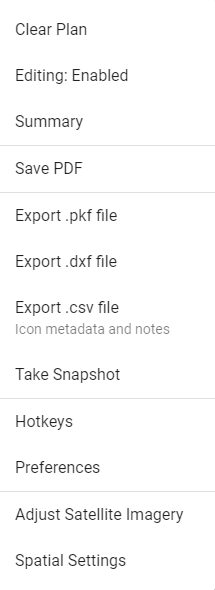
SettingsClicking the Settings button  will open a menu with a few options, and settings you can change to suite your personal preferences.
- Clear Plan: you to clear your entire floor of site plan, to return to a blank slate.
- Editing: See if you have the permission to make edits to the plan,
- Summary: opens a summary page where you can View and extract data, photos and information stored on the plan.
- You also have some exporting options
- Save PDF: to export a basic PDF of your current screen
- Export .pkf file: to export a file of your entire floor or site plan, including all structural elements, Icons and images
- Export .DXF file: Export a CAD compatible version of your Floorplan
- Export .CSV file: creates a spreadsheet of all the current Data collected in the plan
- Take Snapshot: creates a print screen image of the current visible plan.
- Hotkeys: lets you customize your hotkeys for tools and menus inside PlanStudio
- Preferences: Explained in detail below
- Adjust Satellite Imagery: allows you to manipulate as well as change the satellite image being used as the site plan
- Spatial Settings: See and manually edit the geotags used to geolocate your plan.
Preferences
The Preferences menu allows you to change some of the settings in the software, such as the units of measurement, the size of equipment on your screen, the camera defaults for your device as well as the touch screen settings for users with and without a stylus. For touch screen users you can also enable a Virtual Shift Key, to assist with selecting multiple objects in a plan, there are also some display options. These preferences will vary between users depending on your device, your permissions level as well as the current version of the software. In the settings you have the option to adjust satellite imagery. If you want to change satellite image provider as well as a spatial settings button to view the geotags for your floorplan.
To get started creating your first plan, See Importing and Scaling Floor Plans.